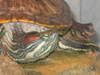
Habitat - Indoor :: My attempt at an above tank basking.

Turtle tank setups and other indoor configurations.

Post Posted: Sun Feb 03, 2008 1:06 am   My attempt at an above tank basking.

I said a few days back that I'll be bringing my turtle home after having lived the last couple years in a 15 gallon tank at work. Well, I've been working on his new 75 gallon home and it's been coming along.

I had never built a basking area with ramp before so this has been interesting. I hope I've got things right (enough) and I would appreciate any opinions from you guys. I used tile to line the bottom which I think is rough enough to give his feet traction for climbing it. I need to buy some more tile to finish it tho. and need to dremel out the rough edges.

I think I'll mount a spot light to the wall above it whenever I get around to buying one.

Let me know what you think.


Plexiglass + plastic epoxy. Thank god for the dremel!

Image

Image

The tank. I spray painted the hood black last week to match the rest of it. I bought/built the hood many moons ago but never got to use it on a planted tank like I wanted.

Image

Image

With tile on it..

Image

Image

Image


The tile isn't totally done.. I need to get more.. And I don't know if i should put wire mesh on the top in case the turtle decides to grow rabbit feet.
mrhappy
 
Posts: 19
Joined: Jan 22, 2008

Post Posted: Sun Feb 03, 2008 3:24 am   

Very nice!
As for the wire mesh on top, it depends on how big your turtles are. If they could reach the top of the wall on their back legs, you'd probably want to consider something on the top. Remember with the mesh, make sure the openings are at least 1/2" so the uvb can get through unobstructed. The other option is to put a lip all the way around the basking area, so even if the turts could stand up, they won't be able to get past the lip :)
­Ralpheal, "The 'L' is silent."
Frankie, "Young at heart."
User avatar
BullDog
Senior Member
 
Posts: 3889
Joined: Jun 21, 2006
Location: BC, Canada

Post Posted: Sun Feb 03, 2008 7:54 am   

he's definitely big enough to reach the top of that if he stood on his rear legs. I guess I could either raise the top by adding a few inches of plexiglass al the way around. or cover with wire mesh. Easiest might be the mesh.
mrhappy
 
Posts: 19
Joined: Jan 22, 2008

Post Posted: Sun Feb 03, 2008 5:27 pm   

wow thats super cool
great job
ashleygamergirl
 
Posts: 279
Joined: Nov 4, 2007
Location: new jersey

Post Posted: Sun Feb 03, 2008 9:31 pm   

That's pretty nice....Is the entrance wide enough for him? You may also want to consider a piece of felt or maybe rubber to insulate the ramp from the light hood in case it gets too hot.
"Make it turtle proof, and they'll build a better turtle."
User avatar
grey goose
Senior Member
 
Posts: 1941
Joined: Jul 12, 2006

Post Posted: Mon Feb 04, 2008 1:20 am   

I made my above tank basking area out of plexiglass as well. It has a platform and a ramp that takes up the entire left side of the tank. (Big area!)I thought about using tile as well because it looks nice, but I realized, unless the tiles are small, she's not going to be able to grip and climb, and I'm not doing that much gluing. Plus I wanted everything to be black and clear, no color and I couldn't find black tiles. Remember their reach is more outward and not straight up. Have you thought about putting rubber on the ramp?

Beautiful job, btw. It's beautiful.
RES: Harvey (she's a girl)
Age: 20 yrs
Size: 8"
Favorite Pastime: Dislodging her filter's intake tube and splashing water.
User avatar
TomGirl
 
Posts: 50
Joined: Jun 21, 2007
Location: New York, NY

Post Posted: Tue Feb 05, 2008 3:58 pm   

Question for Mrhappy, Grey Goose and anyone else who has built an out of tank basking area...How are you anchoring it so that the turtle doesn't flip it when it climbs on to it? It seems that there is a lip where the tank cover sits on yours but what else can one do? Perhaps the tiles add weight but I have a plastic bin and bought reptile carpet liner, which equals no weight to hold it down. Any ideas on how to secure this light weight alternative? (It's really a quick fix for a 6" kiddo stuck (for now) in a 30 gallon tank, where an outside basking spot would fetch her 5 more inches of swim space. Thanks in advance!
User avatar
Sally's Mom
 
Posts: 44
Joined: Jan 17, 2008
Location: Transplanted New Yorker in Pompano Beach, FL

Post Posted: Tue Feb 05, 2008 4:22 pm   

I've never built an above tank or out of tank basking area but that is a good question. Some of the designs do appear to be lightweight. On my in tank ones I created a slot to keep the ramp from flipping over.
"Make it turtle proof, and they'll build a better turtle."
User avatar
grey goose
Senior Member
 
Posts: 1941
Joined: Jul 12, 2006

Post Posted: Tue Feb 05, 2008 6:31 pm   

Sally -
The ramp part on mine is friction fit into the lip of the tank, so it's doesn't move at all.
I ended up using a plastic bin (upside-down) as a cage type idea. I threaded strings through the holes and suctioned the bin onto the side of the tank.
Since it's at the end, there's one suction cup at the end, and two on the sides. The ones on the sides are pulling the bin toward the center of the tank, so she doesn't try to push it off the end. Here's some pics:
http://www.redearslider.com/forum/viewtopic.php?t=13987

If the bin you have doesn't have holes, you can poke a hole. An easy (and relatively safe) way to do this is get a large-ish nail (the size you want the holes to be), put it in vise grip pliers, then stick the nail on the stove element to heat it up warm enough to melt through the plastic. Worked great for me...
­Ralpheal, "The 'L' is silent."
Frankie, "Young at heart."
User avatar
BullDog
Senior Member
 
Posts: 3889
Joined: Jun 21, 2006
Location: BC, Canada

Post Posted: Tue Feb 05, 2008 7:20 pm   

For Pete's sake BullDog, I even commented on your use of suction cups when you first posted your photos but I'm a ditz! Thanks for the providing the link to your project here. I didn't look at your photos right the first time to realize that your 'deck' was wedged in the lip and I initially was trying to figure out a way to secure the entire bin versus securing the deck and then simply bracing the 'cage' with suction cups. Sally's 6" and has substantial weight, so I wasn't sure it would work but I've got it now. I appreciate the help and will post a photo if I pull it off.

I'm sorry for the mix up GreyGoose; I remembered your fine craftsmanship but got the project all wrong! Thanks for your tip.
User avatar
Sally's Mom
 
Posts: 44
Joined: Jan 17, 2008
Location: Transplanted New Yorker in Pompano Beach, FL

Post Posted: Sun Feb 10, 2008 11:31 pm   

Thanks for the comments. I was on vacation for 10 days so I didn't get to read any of it till now.

Sally'sMom, With the tile, it's super heavy so there's no way mr. happy can flip it.

grey goose, I think the entrance is wide enough. but if he grows more or there's a problem, there is room to break up the side and make it wider.

I may finish it tomorrow if I'm lucky. mr. happy's claws are huge which is why I think he won't have trouble climbing the tile. But I am worried about his nails getting caught between the tiles.
mrhappy
 
Posts: 19
Joined: Jan 22, 2008


Return to Habitat - Indoor

Who is online

Users browsing this forum: No registered users and 58 guests